This portable 3 band GP antenna was constructed after I’d used mono-band GPs for a couple of years and found that instant band changing was really needed.
There are no lossy traps and no fiddling with loading coils. The only tuning and pruning I’ve done is slight adjustment to the lengths of the radials. As designed, the GP covers 12,17 and 20m (no harmonic relationship) and will also tune on 30m though is probably as efficient as a bit of wet string on this band.
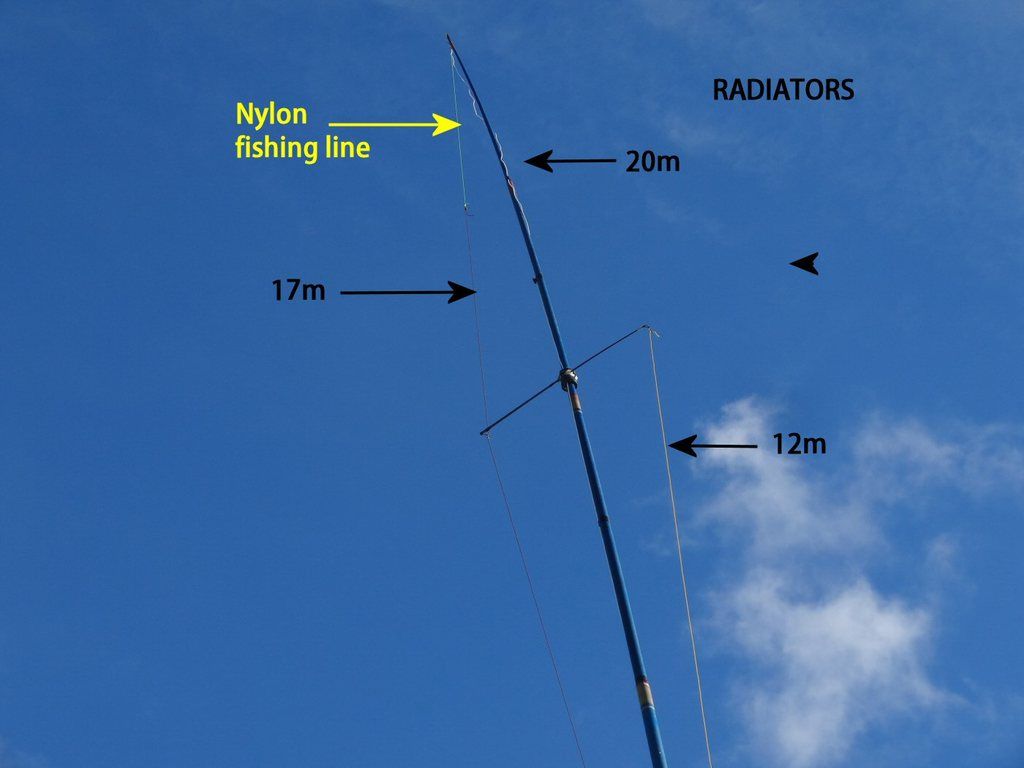
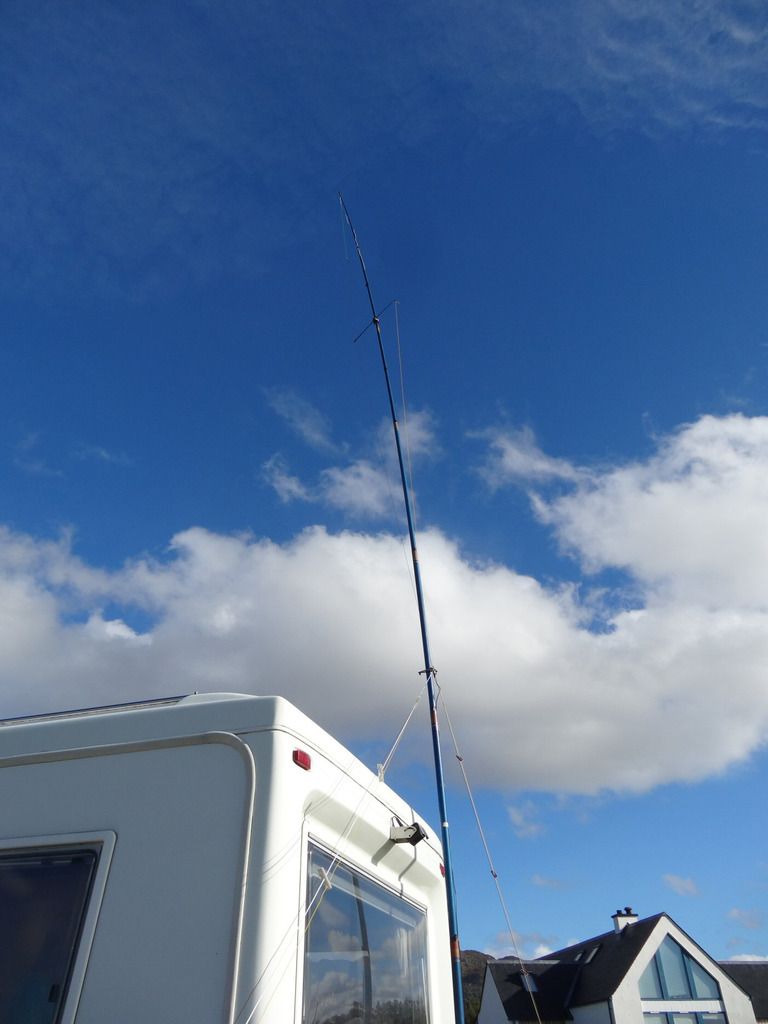
As shown the antenna is supported by a 9m fishing pole fastened to the remains of a bike rack on the back of our motor home but could also be deployed as free standing with the addition of three (or four) guys between the feed point/radial connections and the base. It is light and has very low wind resistance and has stood up to a couple of severe Atlantic gales with no damage. I use only two sets of 3 parallel radials as we are usually based on camp sites with limited space. The two radial sets help provide lateral support. If more space were to be available I’d use 3 sets of radials.
Construction:I started with a length of loudspeaker wire cut to 5m (16’5”) as the 20m radiating element. At the top this is terminated with a hook of hard drawn copper wire. This hooks into a short loop of nylon fishing line that runs through a tapered plastic chopstick that plugs into the top of the fishing pole. This plastic plug ensures that stresses at the top of the pole are evenly distributed and there is no chance of the pole being split or cracked.
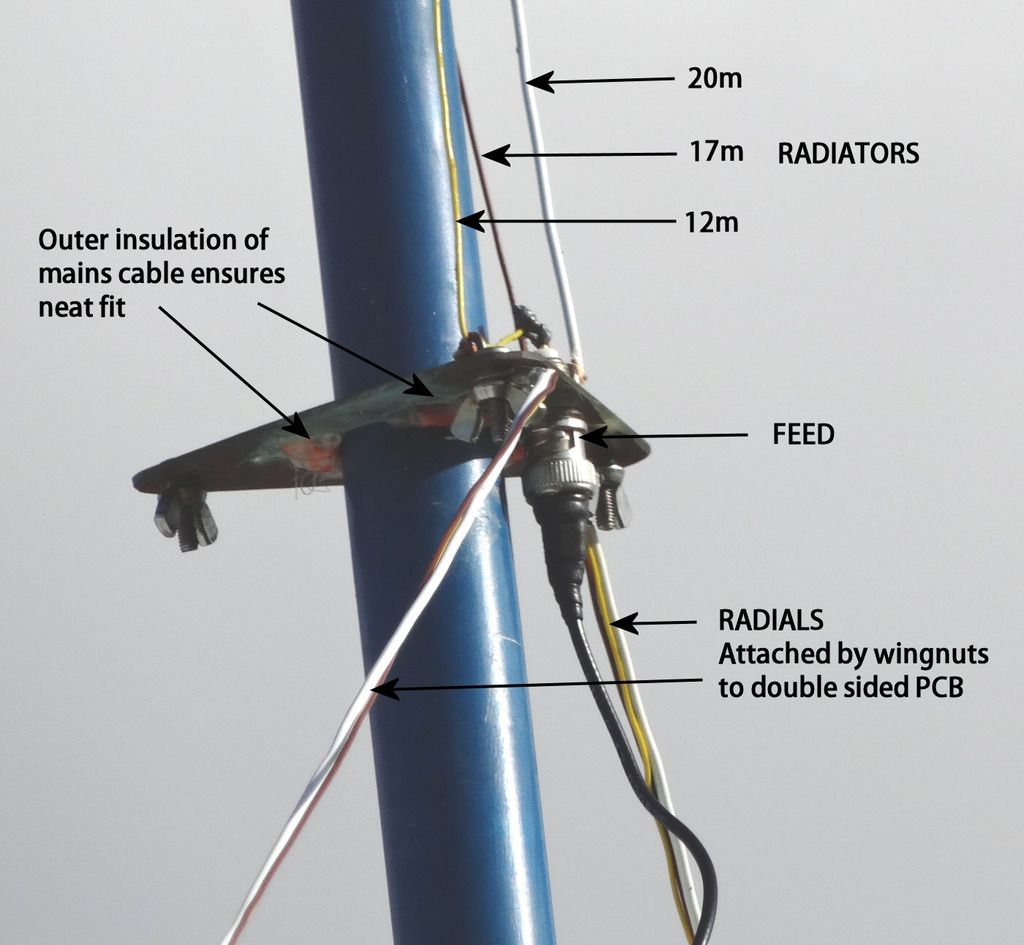
Extending the 20m driven element wire down the fishing pole gives me the point where I need to place the feed point and attachment for radials. I measure the diameter of the pole at this point and cut a triangular section of double sided PCB with a hole very slightly larger than the measured diameter. I then cut 3 or four short pieces of insulation from a round section mains cable and slit and glue these opposite each other in the large ring in the attachment point. This gives a bit of’ give and take’ when sliding the attachment onto the mast and ensures a neat final fit.
I also drill the three corners of the PCB and fix small bolts and wing nuts to attach the radials and drill and fix BNC socket for the feed.
I cut the radiating elements for 17m and 12m to lengths of 3.9m/12’10” and 2.9m/9’’4” and used very thin insulated wire for these to minimise visual impact, weight and wind resistance.
A BNC socket is fitted to the PCB and in order to prevent the driven element wires pulling directly on the soldered feed on the socket I screwed and glued three small eye hooks into the PCB after removing small rings of copper. The driven wires are then looped round the hooks before being soldered to the BNC socket.
The next step was to make a spreader for the driven elements. In my case I used a section from the top of a fibreglass fishing rod – strong and very light and as it turned out I was able to use the rings used to run fishing line through to run the wire through. I bound and glued the spreader to a small length of yellow plastic-type gas pipe that slips down the pole and is positioned at a level to support the tip of the 12m element. To make this fit snugly I used domestic draught-proofing tape looped through the pipe.
The 17m element is then run through the ring on the other end of the spreader up to the top of the pole and extended to attach to the pole tip by a short length of nylon fishing line. All the driven elements are terminated with hooks made from hard drawn copper wire – this make attachment very quick and easy and the slight tension on the wires holds the hooks in place.
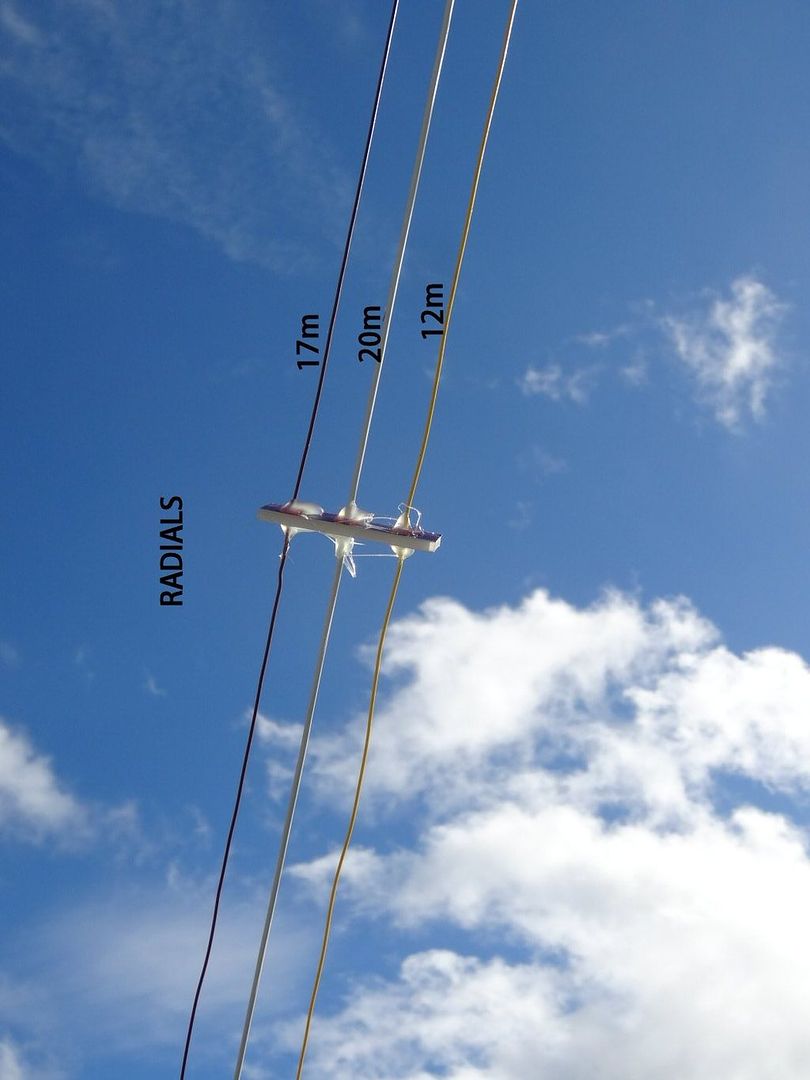
The radials were cut slightly longer than the driven elements in order to allow for tuning. I made spreaders from some corrugated plastic (cut from a ‘house for sale’ sign that had blown into our garden!) Each spreader is about 9cm/3.5”. The 20m radial is the middle wire and carries all the tension as it is the one that is attached to a guy line and peg. The spreaders once evenly spaced are glued to the radials with a hot glue gun. At the top (feed point) the radials come together and are soldered to washers for easy attachment to the bolts on the PCB.
Tuning:Using the given sizes and with the radials sloping at about 45 degrees it ought not to be difficult to get a decent VSWR and an acceptable Z on all three bands. Just how much pruning is involved will depend on environmental factors. I did all my ‘pruning’ by adjusting the lengths of the radials. I found I had to add about 5cm to the 17m radial and shorten the 20m radial considerably. Shortening is easy – just coil up the end rather than cut it.
How well does it perform?Location, location, location seem to be prime factors followed by propagation conditions Over the past two years I’ve made just short of 2000 /P QRP contacts. About half of these have been from sites on the west coast of Scotland or from Scottish islands. Contacts with stations in NA have been frequent. There have been a few JAs, a VP8 and one or two in the Caribbean as well as a few in SA. Highlight of the last trip to our west coast (and propagation was very poor most of the time) was ZF2DX who was working a big EU pileup and I caught him on my second call.


73/72
Dave